How to Add or Edit Bank Details on GST Portal: The Goods and Services Tax (GST) portal is an essential part of doing business in India. It’s where businesses manage their taxes, file returns, and update important details like bank accounts. Updating your bank account information on the GST portal is not just a formality – it ensures smooth transactions, helps in processing refunds, and allows you to stay compliant with government regulations. But it’s easy to get tripped up by the details and make a mistake. That’s why we’ve put together this guide to help you navigate the process without errors. Whether you are adding a new account for the first time or editing an existing one, getting this right is crucial for the proper functioning of your GST filing process. In this article, we’ll break down the entire procedure step-by-step, share some tips, and answer your most frequently asked questions.
How to Add or Edit Bank Details on GST Portal?
Updating your bank account details on the GST portal is a simple process, but it requires attention to detail. By following the steps outlined in this guide, you can ensure that your information is correct, avoiding errors and delays in your GST filings. Remember, keeping your details updated not only ensures compliance but also helps you avoid penalties and ensures smooth financial operations for your business. To stay on top of your GST filings and ensure that your bank details are accurate, always double-check the information you provide, use the correct documentation, and monitor your application status. By doing so, you’ll keep your business running smoothly and stay compliant with all tax regulations.
| Topic | Details |
|---|---|
| Process | Step-by-step guide to update/edit bank details on GST portal. |
| Common Errors | Invalid IFSC code, incorrect account number, document upload issues. |
| Documentation Required | Cancelled cheque, bank statement, or passbook. |
| Processing Time | Typically, within 7 working days after submission. |
| Important Rule | Bank details must be updated before filing GSTR-1 to avoid penalties. |
| Official Website for Reference | GST Portal |
Introduction
If you are a business owner registered under GST in India, you must keep your bank details up to date on the GST portal. Not only does this ensure timely tax payments, but it also facilitates smooth refunds and helps maintain compliance. If you ever change your business bank account, or if you made an error when entering your account details, you’ll need to update them on the portal.
The process for updating or adding bank details on the GST portal is fairly simple but requires careful attention to avoid common mistakes. In this guide, we’ll walk you through how to do it step-by-step, making it easy to follow even for someone who isn’t tech-savvy.
Why Is It Important to Keep Your Bank Details Updated on the GST Portal?
The GST portal is not just a tax filing system – it’s a crucial part of your business infrastructure. If you fail to update your bank details, you could face issues like delayed refunds, errors in your return filings, or even legal consequences.
Here’s why keeping your bank account details updated on the portal is essential:
- Refund Processing: GST refunds are directly credited to your bank account. If your details aren’t correct, you could miss out on receiving refunds.
- Compliance: The GST law requires businesses to provide accurate and up-to-date information, including bank details. Failure to comply could lead to penalties.
- Error-Free Transactions: Accurate bank information ensures smooth transactions between the taxpayer and the government.
Steps to Add or Edit Bank Details on GST Portal Without Errors
Now, let’s dive into the process. Whether you’re adding a new bank account or updating an existing one, the steps are simple but need to be followed correctly to avoid any errors.
Step 1: Log In to the GST Portal
To begin, you’ll need to log into the GST portal. Visit www.gst.gov.in and enter your GSTIN, Username, and Password. After logging in, you’ll be taken to the dashboard.
Step 2: Navigate to the Registration Section
Once logged in, click on the Services tab in the top menu. Under this tab, you’ll find Registration. Hover over it, and from the dropdown menu, click on Amendment of Registration (Non-Core Fields).
This will take you to the section where you can amend your registration details, including your bank account information.
Step 3: Go to the Bank Account Tab
In the Amendment of Registration section, you’ll see several options. Click on the Bank Accounts tab. Here, you will have the option to Add New or Edit existing bank account details.
- If you’re adding a new bank account, click on Add New.
- If you need to update an existing bank account, click on Edit.
Step 4: Enter Your Bank Account Information
Next, you’ll be required to fill in the details of your bank account. This includes:
- Account Number: Double-check that you’ve entered this correctly.
- Account Type: Choose between Savings or Current.
- Bank Name: Enter the name of the bank exactly as it appears on your official documents.
- IFSC Code: The correct IFSC code is crucial for accurate transactions.
- Branch Name: Include the branch name where your account is located.
Step 5: Validate Bank Details
Once you’ve entered all the required details, you’ll need to validate the bank account information. Click on Validate Account Details. If the details are correct, you’ll receive a validation message. If there’s an error, the system will prompt you to correct it.
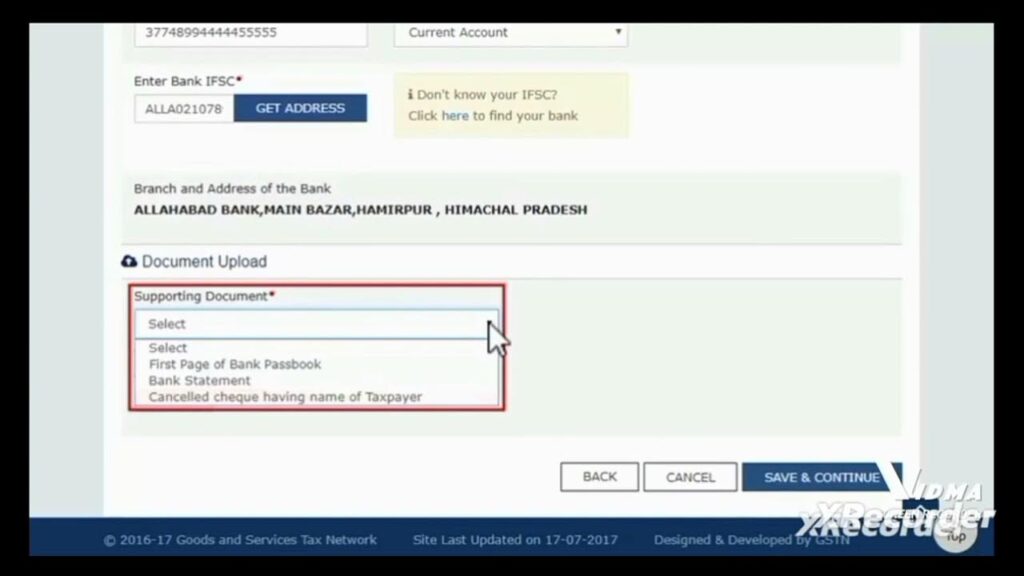
Step 6: Upload Supporting Documents
To complete the process, you must upload proof of your bank account details. You can provide one of the following:
- Cancelled cheque: The cheque must have your name printed on it.
- Bank Statement: A recent statement showing your name and account number.
- First page of your passbook: This should clearly display the required details.
Ensure that your document is clear, legible, and in the correct format (PDF or JPEG) and does not exceed 100 KB in size.
Step 7: Submit the Request
After validating the bank details and uploading the necessary documents, you can Save & Continue. Review your details carefully before submitting. Once you’re sure everything is correct, you’ll need to Verify your submission.
You can do this using one of the following methods:
- Digital Signature Certificate (DSC): This is required for companies and LLPs.
- Electronic Verification Code (EVC): This is used by individuals and non-DSC users.
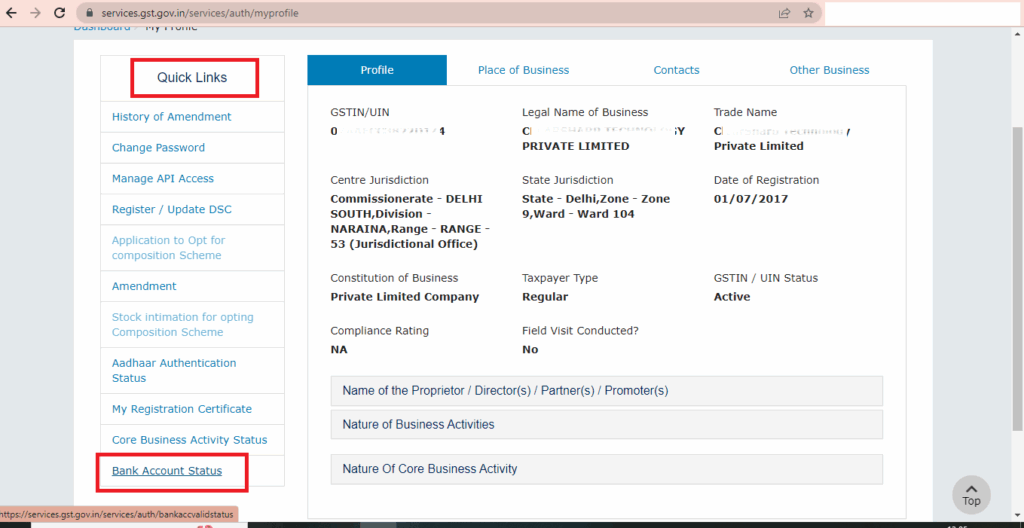
Step 8: Track the Status of Your Application
Once you’ve submitted your request, you’ll receive an Application Reference Number (ARN). Use this number to track the status of your request. Typically, the request will be processed within 7 working days, and you will be notified by email and SMS when the update is successful.
What Common Mistakes Should You Avoid?
While the process seems simple, there are a few common mistakes that people often make when updating their bank details. Here are some tips to help you avoid these errors:
- Incorrect IFSC Code: Double-check the IFSC code. Even a small mistake can lead to rejection of your application.
- Missing Documents: Make sure you upload the required documents in the correct format.
- Incorrect Account Number: Verify the account number with your bank to avoid issues.
- Document Size: Ensure the size of your document doesn’t exceed 100 KB.

How to Ensure Smooth GST Filing After Updating Bank Details?
Once you’ve updated your bank details on the GST portal, there are some proactive steps you can take to ensure that your GST filings proceed without issues:
1. Ensure Bank Account Matches Refund Account
If you are claiming GST refunds, make sure that the bank account you’ve registered is the one where you want the refund to be credited. Double-check the bank details every time you file your returns.
2. Cross-Verify the Account Information in GSTR Filings
When you file your GSTR-1 or GSTR-3B, make sure that the bank details you’ve entered match what’s on the GST portal. If there’s a mismatch, your filings may be rejected.
3. Regularly Update Your GST Profile
Even if you don’t change your bank details often, it’s a good practice to log into your GST portal regularly and review your account details. This will ensure that everything remains accurate and up-to-date.
4. Consult Your Chartered Accountant (CA)
If you have a CA who handles your GST filings, consult them after updating your bank details. They can ensure that your filings go smoothly and that there are no issues with refunds or payments.
How to Add or Update Bank Details on the GST Portal Without Errors
West Bengal’s GST Revenue Soars 12% in July
Maruti Suzuki Subsidiary Slammed With ₹86 Crore GST Penalty in Appellate Ruling


